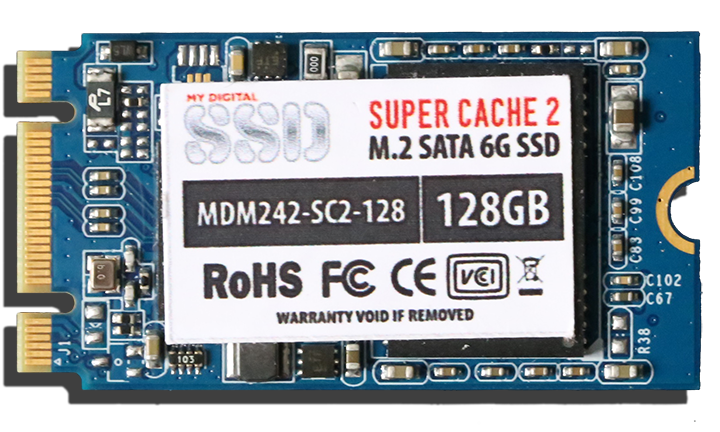
October 17, 2014Making a $400 Linux LaptopAt some point, every programmer should learn how to use the Unix command-line. So I started teaching Piper a bit about how to use a command line shell this week. We installed crouton on her Chromebook, and we used it to look at a couple files and build little shell script. That continuing adventure is a story for another time. But crouton was the surprise for me. I immediately fell in love it. The Linux-on-chromebook setup was so great that a few days later, I made another one. It's an amazing deal: for about $400, I got a lightweight linux box with 4GB RAM, 128G SSD mostly empty, 8 hours of battery, and a touchscreen! Here is what I bought: The new C720P with 4GB ram, but the cheap configuration with a 16G SSD  MyDigitalSSD SC2 Super Cache 2 42mm SATA III 6G M.2 NGFF M2 SSD Solid State Drive (128GB)  It was a terrific little project, very easy. The basic idea is to follow the SSD upgrade instructions here There are only a couple gotchas. One is at the start: you want to begin by burning a recovery image on a USB stick, which should just take a couple minutes. But the instructions above say to use the URL "chrome://imageburner" to make this, and it doesn't actually work on the c720p (it runs, but then it hangs). Instead, go to the Chrome App store and search for the Chromebook Recovery Utility. That will make a recovery image quickly. Then you're ready to upgrade the disk! Piper and I unscrewed the laptop and followed the instructions here - it was a great chance for us to take a look at all the innards of the computer, and it was a very easy upgrade. The only other gotcha is that he M2 SSD card doesn't go in either way: there is a "right" and a "left" - one side with four gold connectors and the other side with five. The big brand-name sticker on the new SSD we got was on the opposite side as the old one, which confused us; it just needed to be flipped upside-down, sticker down. Then we reassembled and rebooted the computer, stuck in the recovery USB drive, and then followed this page's advice on how to enable developer mode. In short: ESC-F3 and Power. Then control-D, and then wait. Apparently converting the huge 128G SSD to developer mode, takes a little while; but there is an ASCII art progress bar at the top of the screen. Finally, we downloaded crouton from goo.gl/fd3zc, and then we used ctrl-alt-T to bring up a crosh tab; entered shell; then ran the crouton script to install a command-line-only debian. It's terrifically functional - I used it to build a current build of node.js and some other things. It's not terribly secure, because anybody who can log into the machine can get root access. But for student work, it's great! Posted by David at October 17, 2014 08:27 PMComments
Post a comment
|
| Copyright 2014 © David Bau. All Rights Reserved. |