March 27, 2007Kid's Garden Bench
All winter long we have had a few pieces of extra lumber stacked outside the house just waiting to be used (they were left over from last year's treehouse project). So after breakfast I told the kids we were going outside to build something, and I sketched a picture of a garden bench. Piper Lays Out The Alternatives But as soon as she saw me drawing plans, five-year old Piper knew she could do better. So she grabbed her own piece of paper and drew some benches too. Instead of just drawing one bench, she drew two benches, complete with little arrows marked with dimensions (just like Daddy's, except with fantastical numbers). "We can build either one," she explained, pointing to her two drawings. "A big grown-up bench with no arms" - her first drawing looked just like mine - "or a small bench with arms...." I tried to tell her that a big bench might be more useful than a little one. But she proved me wrong by sitting down on a chair with her arms bent at 90 degrees in imaginary-armrest position. Oh, how nice it would be to have a little bench with little arms. That Piper - she is a clever one, isn't she? So a kid-bench it would be. With arms. Steps for Building a Small Kid Bench With Arms Here is what we used to build our kid bench:
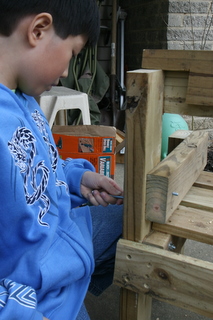
First we glued together a pair of "H" shapes with the 2x4s, with the 24" 2x4 (for the back) and 18" 2x4's (for the front) going vertically and a single 12" 2x4 horizontally, set so the top of the 12" 2x4 is 12 inches off the ground. Of course you have to make the two H shapes mirror-image symmetric. Then I drilled a pair of 1/4" holes in the each of the joints and Anthony hammered the carriage bolts through, and put on the washers and nuts. Then we glued on three 36" seat slats so they rested on the 12" 2x4s. We arranged the slats so the frontmost one stuck out the front by about half an inch, and the back couple inches of the 12" 2x4s were uncovered. After the glue dried, these slats got screwed into the supporting 2x4. Then we glued the second pair of 12" 2x4 to support the armrests. These had to go on after the seat slats, or else we wouldn't have had space to screw the slats down. After these were glued, we glued the 11.5" 1x4 armrests flat on top (extending 1/2" out to the sides and out the front). Then we glued and screwed in a pair of 39.5" slats for the back (one of them had to be notched with a jigsaw to fit over the armrests), and we added two pairs of carriage bolts to join the armrest-supporting 2x4 to the 24" 2x4s. A third 39.5" slat was added on the back, behind the seat-supporting 2x4s, for strength. Voila! Kid's garden bench. 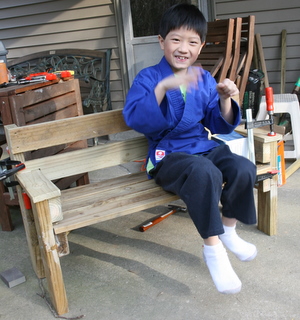 Comments
its been a good eploration work Posted by: manisha at May 19, 2008 05:18 AMPost a comment
|
| Copyright 2007 © David Bau. All Rights Reserved. |
 It's springtime! On Sunday the kids threatened to stay inside all day playing video games, but Dad had a different plan.
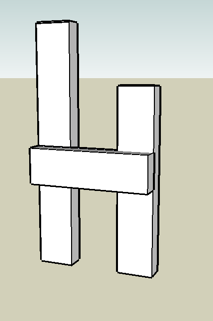 For tools, we just used a saw (a jigsaw was fine), a drill, a screwdriver, and a bunch of clamps for glueing.